AI Generating Site UI-s
Blog Site Experiment
The plan was simple: I wanted to get inspired and generate a few front page themes that I could reuse across different pages of the blog.
Since joining Bullhorn about 3.5 years ago, I haven’t really worked with the frontend stack much. So, I decided to spend a day experimenting with the new Astro framework to build a personal blog site.
The goal was to see to do this in 1 day and see if I could write a full site skeleton and implement key functionality such as page routing, hosting, preloading routes, and caching as much static content as possible to keep the site fast and responsive.
Knowing that I was a bit “rusty” with frontend frameworks and not in the mood to write custom CSS, I decided to try v0.dev (an AI model provided by Vercel, trained on a variety of web frameworks).
So, I gave it a try…
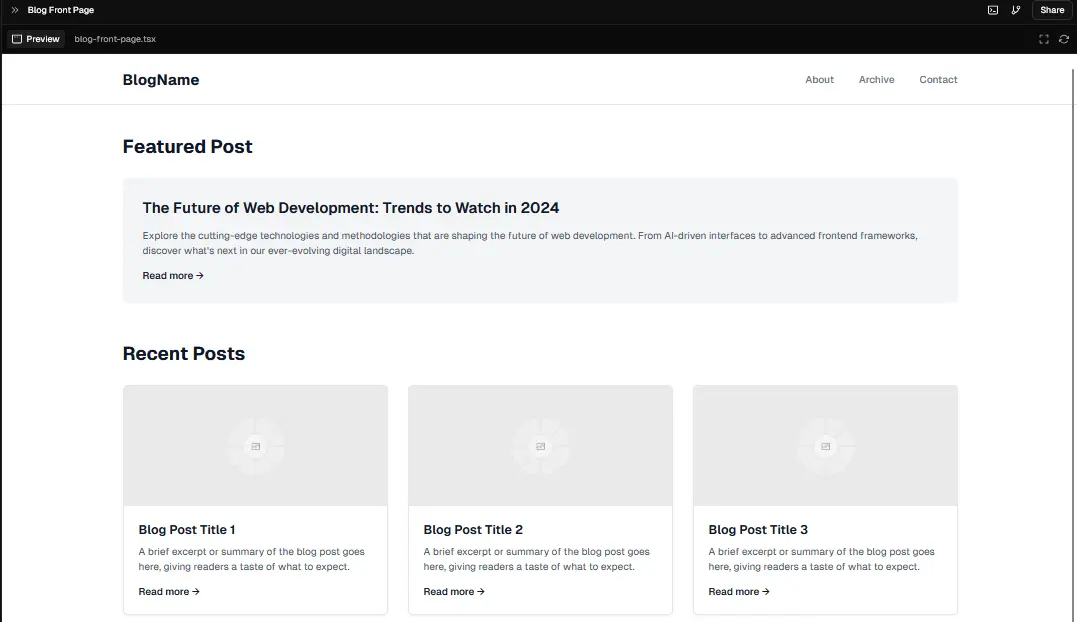
v0_prompt_1
I want a sleek and professional component that I could use for my blogs website front page.
I prefer white and black minimal designs.
I prefer using tailwind for the CSS of the page.
Generated this :
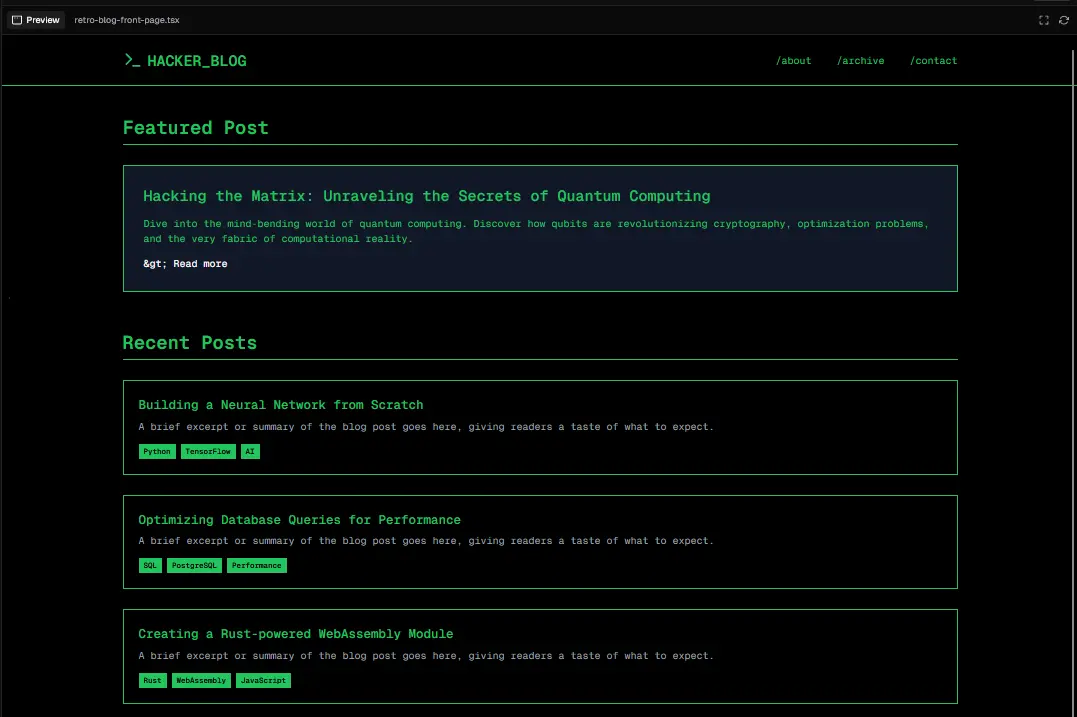
v0_prompt_2
I want a sleek and professional component that I could use for my blogs website front page.
I prefer white and black minimal designs.
I prefer using tailwind for the CSS of the page.
I prefer old school retro style design and 'hacker' style font .
I will not have preview images for each blog post, I will have tags for programming languages used in those projects at the bottom of  each post component (React , csharp, Rust ,SQL ... ) etc...
Generated this :
Surprisingly, v0.dev generated some pretty decent (and not overly generic) UIs on the second try—at least to my non-frontend-engineer eyes. :)
I specifically mentioned Tailwind in my prompts because I was already familiar with this CSS framework and knew how to tweak it if needed. Since I don’t do much frontend work these days, this inline CSS approach for rapid prototyping works great for my simple blog site.
I spent a few hours tweaking the presets generated by the default command:
npm create astro@latest -- --template blog
I then sliced the generated React + Tailwind components into separate files:
Home.astroHeader.astroFooter.astro
I also tweaked majority of other astro files to be able to propagate my ‘site theme’ across all pages.
Finally, I adjusted the Astro config file to enable hosting the site on Cloudflare Pages.
import { defineConfig } from 'astro/config';

import sitemap from '@astrojs/sitemap';
import mdx from '@astrojs/mdx';
import tailwind from '@astrojs/tailwind';
import react from "@astrojs/react";
import cloudflare from '@astrojs/cloudflare';

// https://astro.build/config
export default defineConfig({
 site:"https://dpolzer.pages.dev",
 integrations: [mdx(), sitemap(), react(), tailwind()],
 //https://docs.astro.build/en/guides/prefetch/
 prefetch:true,
 output:"server",
 adapter: cloudflare()
});
I than followed a few docs from cloudflare, I also left a few helpfull links in my git repo for this project.
It was pretty nice to see I was able to do this in just a couple of hours, and the resulted bundle transfered was tiny and that most of static content is cached as expected.
I only had to add _headers file to help out cloudflare with font’s caching ttl.
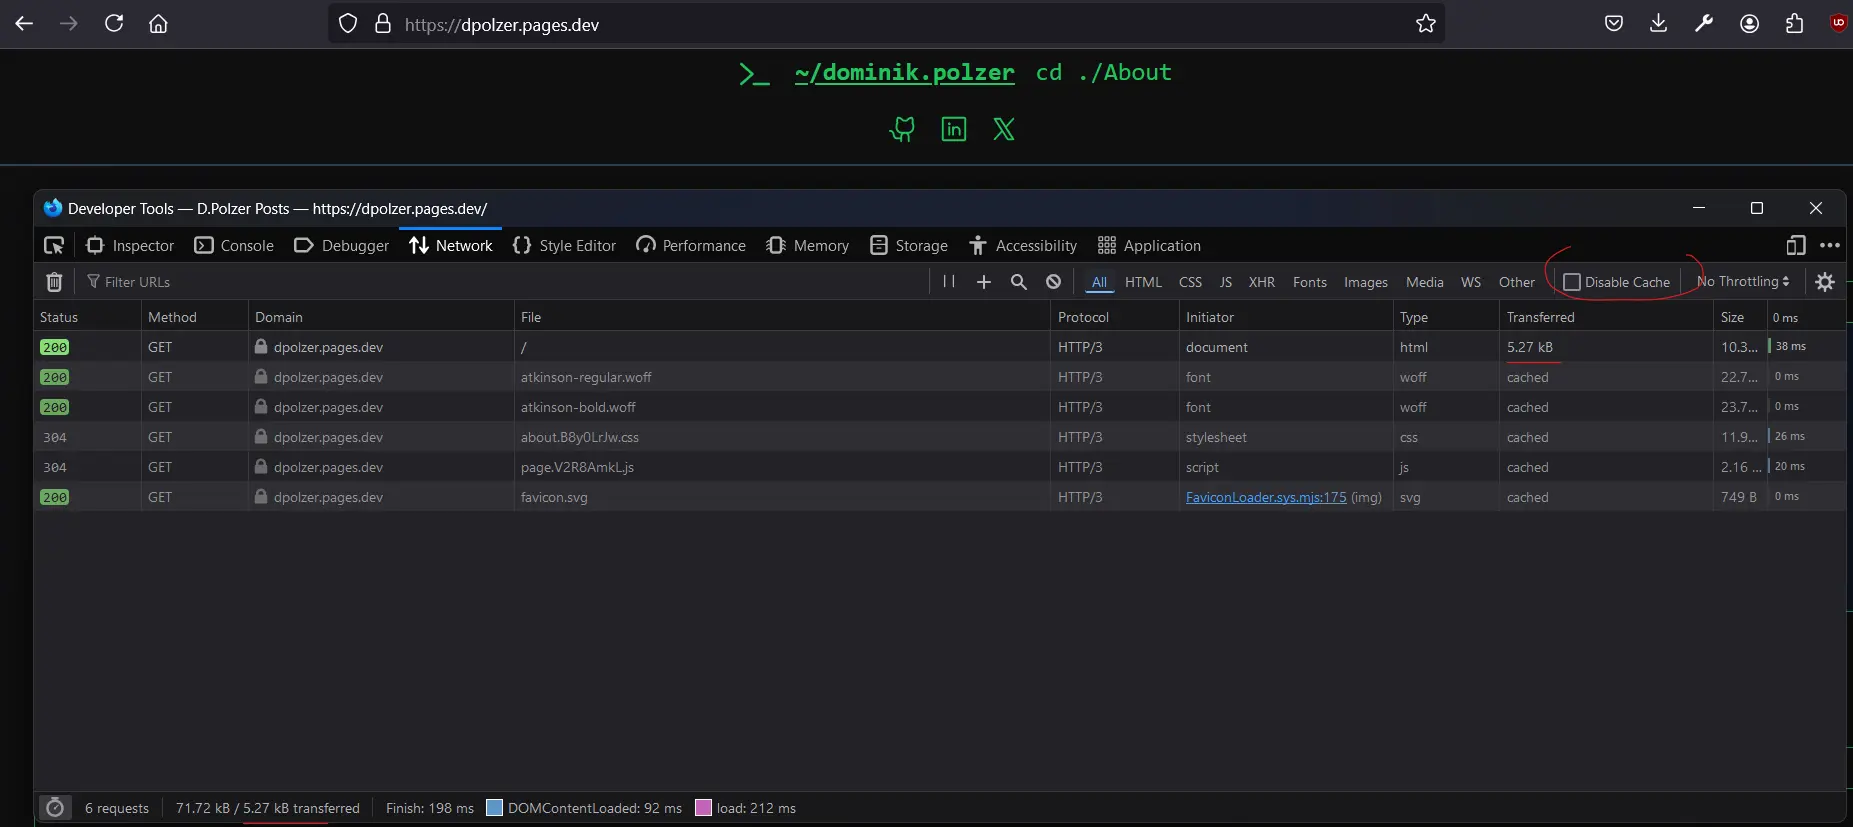
- Homepage @ dpolzer.pages.dev
- compact overview @ dpolzer.pages.dev/blog
Dominik Polzer